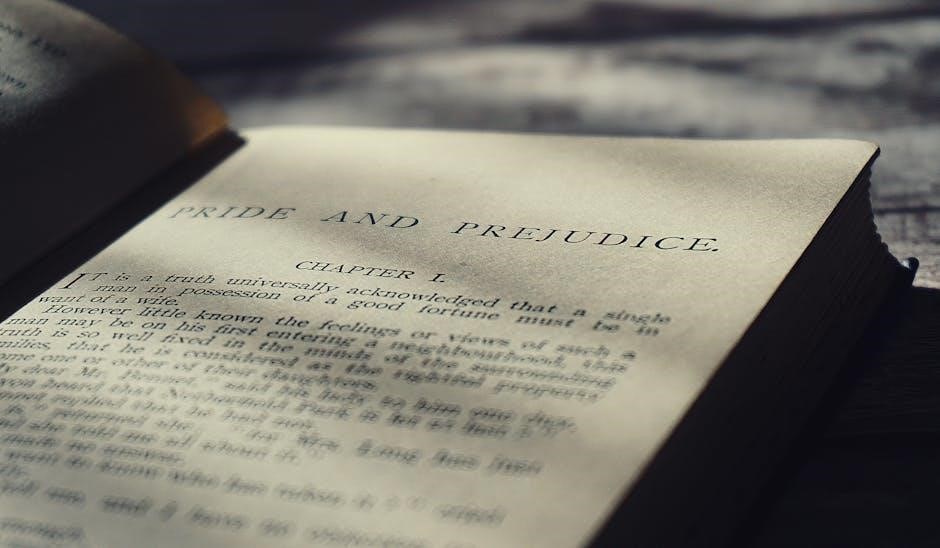
Categories
PDF

i todhunter jg leathem pdf free download

I. Todhunter and J.G. Leathem’s Works

I. Todhunter and J.G. Leathem collaborated on “Spherical Trigonometry,” a key work for colleges and schools. Leathem revised Todhunter’s original text, ensuring its continued relevance. Their combined efforts made this book a staple in mathematical education.

Overview of their collaborations

Isaac Todhunter, a distinguished mathematician, originally authored “Spherical Trigonometry.” J.G. Leathem later revised Todhunter’s work, enhancing its clarity and relevance for subsequent generations of students. Their collaboration, although separated by time, produced a lasting educational resource. Leathem’s revisions ensured the book remained accessible and useful in colleges and schools. The partnership between Todhunter’s foundational work and Leathem’s improvements created a significant contribution to mathematical literature. The collaboration aimed to make the complex concepts understandable and applicable for students studying spherical trigonometry. Their joint effort solidified the book’s place as a standard textbook.

Spherical Trigonometry

“Spherical Trigonometry” by Todhunter and Leathem is available in various editions. It can be accessed through libraries, archives, and online platforms. A free PDF download option also exists for those seeking digital access.

Availability of “Spherical Trigonometry” by Todhunter and Leathem

“Spherical Trigonometry” by I. Todhunter, revised by J.G. Leathem, is accessible through multiple avenues. Physical copies can be found in libraries, particularly university libraries like the University of Toronto. Digitized versions are available via platforms like the Internet Archive. Many editions are in the public domain, making them freely accessible for download. Look for options on sites offering public domain books and academic resources. Check university repositories and online catalogs to find the edition that best suits your needs. Availability may vary depending on the edition and publisher.

Free PDF Download Sources

Finding a free PDF download of “Spherical Trigonometry” by Todhunter and Leathem is achievable through several online resources. The Internet Archive hosts digitized versions available for free download; Project Gutenberg also offers a free ebook version. University libraries often provide access to digitized books in the public domain. HathiTrust is another excellent source for accessing scanned copies. Be sure to verify the edition and revision when downloading. Always ensure that the site you are using is reputable to avoid malware or copyright infringement. Look for versions revised by J.G. Leathem for the complete edition.

I. Todhunter’s Biography

Isaac Todhunter (1820-1884) was a renowned mathematician. He was also an academic who significantly contributed to mathematical education. He authored numerous textbooks. He was a Fellow of St. John’s College, Cambridge, leaving a legacy of scholarship.

Life and Academic Career

Isaac Todhunter, born in 1820, had a distinguished academic career. He became a Fellow of St. John’s College, Cambridge. He dedicated his life to mathematics. He also became known for his comprehensive textbooks. His works covered a range of mathematical topics. His rigorous approach to education made his books standard texts for generations of students. Todhunter married Louisa Anna Maria Davies in 1864. He continued to contribute to mathematical scholarship until his death in 1884, leaving a lasting legacy in mathematical education and literature.

J.G. Leathem’s Contributions

J.G. Leathem revised Todhunter’s “Spherical Trigonometry,” ensuring its continued relevance for students. Leathem’s updates maintained the book’s rigor while adapting it for new generations. He was a lecturer at St. John’s College.

Leathem’s Revision of Todhunter’s Works

J.G. Leathem played a crucial role in updating I. Todhunter’s “Spherical Trigonometry” for modern students. His revisions ensured the book remained relevant amidst evolving educational standards. Leathem, a fellow and lecturer at St. John’s College, brought his expertise to refine Todhunter’s work. The revised editions reflect Leathem’s deep understanding of the subject matter, making the text more accessible while preserving its mathematical rigor. He maintained the book’s value as a resource for colleges and schools. Leathem’s contributions solidified the book’s place in mathematical literature.

Key Concepts in Spherical Trigonometry

Spherical trigonometry, central to astronomy and navigation for millennia, deals with triangles on spheres. Key concepts involve angles, sides, and their relationships, crucial for calculating distances and positions on Earth and in space.

Applications in Astronomy and Navigation

Spherical trigonometry, as presented in Todhunter and Leathem’s work, finds extensive applications in astronomy, enabling the calculation of celestial object positions. For navigation, it’s vital for determining distances and bearings on the Earth’s spherical surface, essential for maritime and aviation purposes. The principles detailed in their book are foundational for understanding celestial mechanics and accurate spatial orientation. Their work also covers topics that are useful in calculating the angles and sides of spherical triangles, which arise in many astronomical computations, such as determining the angular separation between two stars or planets.

Editions and Publication Details

Todhunter and Leathem’s “Spherical Trigonometry” saw multiple editions, notably published by Macmillan. Later editions incorporated revisions by J.G. Leathem. These editions reflect ongoing efforts to refine and update the material for educational purposes and wider accessibility.

Different Editions and Publishers

Todhunter’s “Spherical Trigonometry,” revised by J.G. Leathem, appeared in numerous editions primarily through Macmillan. These editions span from the late 19th century into the early 20th century, reflecting the book’s enduring significance. Each edition incorporated updates and refinements, often by Leathem, ensuring continued relevance for students. Publication details vary across editions, indicating different printings and slight modifications. Researchers can find these editions in university libraries, archives, and sometimes digitized through online repositories. The consistent presence of Macmillan as the publisher underscores the book’s academic standing and widespread adoption within educational institutions. The revisions highlight a dedication to pedagogical improvement.

Public Domain Status

Works by I. Todhunter are generally in the public domain due to his death date. Later editions revised by J.G. Leathem may have separate copyright considerations depending on their publication date and specific content additions;

Copyright Information and Availability

I. Todhunter’s original works are typically in the public domain because he passed away over 100 years ago. However, the editions revised by J.G. Leathem may have different copyright statuses depending on their publication date and any new material introduced by Leathem. Users should check the publication details and copyright notices within each specific edition to determine its current status. Translations or later editions might be copyrighted based on publication dates. Posthumous works may also have copyrights.

Other Works by I. Todhunter

I. Todhunter authored numerous mathematical publications beyond “Spherical Trigonometry.” These included works on algebra, geometry, and elasticity. His contributions significantly impacted mathematical education and research during his time.

List of Other Mathematical Publications

I. Todhunter was a prolific writer with a range of mathematical publications beyond his collaboration with J.G. Leathem on “Spherical Trigonometry.” His works encompassed various areas, including algebra, geometry, and the history of mathematical theories. Notably, he authored “A History of the Theory of Elasticity,” showcasing his depth in applied mathematics. Todhunter’s textbooks were widely used in colleges and universities, reflecting his commitment to mathematical education. He also contributed to the field with books on differential calculus, integral calculus, and analytical statics. His publications remain valuable resources for understanding classical mathematical approaches. These works exemplify his scholarly contributions.

Where to Find Physical Copies

Physical copies of Todhunter and Leathem’s “Spherical Trigonometry” can be found in university libraries and archives. These institutions often preserve older editions of mathematical texts for historical and research purposes.

Availability in Libraries and Archives

Libraries and archives are prime locations to find physical copies of Todhunter and Leathem’s “Spherical Trigonometry.” University libraries, especially those with strong mathematics or history of science collections, often hold these books. Archives may contain older or rarer editions. Checking the online catalogs of major libraries, such as those at universities like Toronto or institutions with extensive collections, is recommended. Interlibrary loan programs can also facilitate access if a copy is not available locally. Digital archives, while not providing physical copies, can offer information about the book’s presence in various collections worldwide.

Related Mathematical Topics

Todhunter’s work extends beyond spherical trigonometry into areas like algebra, Euclidean geometry, and elasticity theory. Studying these related topics provides a broader understanding of the mathematical landscape of his time and his contributions.

Other Areas of Mathematics Covered by Todhunter

Beyond his notable work on spherical trigonometry, I. Todhunter contributed significantly to several other mathematical domains. His publications encompassed areas such as algebra, calculus, and analytical geometry, showcasing his broad expertise. He also delved into the history of mathematical theories, providing valuable insights into their development. Todhunter’s comprehensive approach to mathematics made him a respected figure in the academic community. His exploration of elasticity and related subjects further demonstrates the breadth of his intellectual curiosity and his dedication to advancing mathematical knowledge across diverse fields.

Categories
Manuals

craftsman t2200 parts manual

Craftsman T2200 Parts Manual Overview

The Craftsman T2200 parts manual serves as a vital resource for owners seeking to maintain and repair their lawn tractors. It provides detailed diagrams, part numbers, and assembly instructions, ensuring accurate identification and replacement of components. This facilitates efficient troubleshooting and maintenance.

The Craftsman T2200 is a popular riding lawn tractor known for its reliability and ease of use. Equipped with a 42-inch cutting deck and a powerful engine, it efficiently handles various lawn care tasks. This model is designed for homeowners seeking a dependable machine for maintaining medium to large-sized yards. The T2200 features user-friendly controls and a comfortable design, making lawn maintenance less of a chore. Its robust construction ensures longevity, while its readily available parts and comprehensive support materials, including the parts manual, contribute to its appeal. Regular maintenance ensures top performance.

Importance of the Parts Manual

The Craftsman T2200 parts manual is an indispensable tool for maintaining your lawn tractor’s optimal performance. It provides detailed diagrams and part numbers, ensuring accurate identification and replacement of components. This manual empowers owners to perform routine maintenance and repairs confidently, saving time and money. Without it, identifying the correct parts can be challenging, leading to potential errors and delays. The manual also aids in understanding the tractor’s assembly and functionality, which enhances troubleshooting capabilities. By consulting the parts manual, users can ensure their T2200 remains in excellent working condition, prolonging its lifespan and maximizing its value, aiding in proper maintenance.

Finding the Correct Parts Manual

Locating the right Craftsman T2200 parts manual involves identifying your specific model number. This ensures compatibility and accuracy when ordering parts or performing repairs. Online resources and manufacturer websites are valuable for finding the correct manual.

Identifying Your Specific T2200 Model

To pinpoint the correct Craftsman T2200 parts manual, first, accurately identify your lawn tractor’s specific model. The model number is typically found on a sticker or plate affixed to the mower’s frame. Common locations include under the seat, on the engine housing, or near the deck.

This number is crucial because Craftsman often releases slightly different versions of the T2200. These variations may have unique parts or assembly configurations. Double-check the location and carefully transcribe the full model number, including any suffixes. This ensures that you obtain the precise parts manual that corresponds to your machine.

Using the Model Number to Locate the Manual

Once you have the T2200’s specific model number, use it to search online databases and manufacturer websites. Sears PartsDirect and PartSelect are excellent resources. Enter the model number into their search bars to find the correct parts manual.

Additionally, check the Craftsman website or contact their customer service. They may offer downloadable manuals or direct you to authorized dealers. When searching, be specific; include the full model number. This ensures that the manual precisely matches your tractor’s specifications. Verify the manual’s cover image and description. It should align with your T2200 model year and features.

Key Components and Diagrams in the Manual

The Craftsman T2200 parts manual showcases essential components through detailed diagrams. These visuals aid in identifying parts within the deck, engine, electrical, and drive systems. Clear illustrations simplify maintenance and repair tasks for users.

Understanding Deck Parts Diagrams

The deck parts diagram for the Craftsman T2200 is crucial for identifying and replacing damaged or worn components. Typically, it includes mower blades, responsible for even cutting, and spindles that hold the blades. Also present are pulleys, vital for the belt system’s smooth operation, and the deck shell itself, which provides structural support.

Understanding these diagrams helps in maintaining a functional mower deck. Key parts include mower blades, spindles, pulleys, and the deck shell. Regular inspection and timely replacement of worn parts ensures efficient grass cutting. Diagrams offer a visual aid for disassembling and reassembling the deck. The manual is invaluable for T2200 owners.

Referencing the diagram enables precise part identification, simplifying the repair process. Knowing each component’s location is essential for effective maintenance.

Engine and Drive Components

The Craftsman T2200 parts manual provides detailed diagrams of engine and drive components. Engine components typically include the carburetor, spark plugs, fuel filter, and oil filter. These parts are crucial for the engine’s proper functioning, ensuring reliable power for mowing; The manual assists in identifying and replacing these engine parts.

Drive components usually include the drive belt, pulleys, and transmission. The drive belt transfers power from the engine to the transmission, enabling the tractor to move. Understanding these diagrams allows for efficient maintenance and repair of the drive system. Regular inspection and replacement ensure smooth operation.

These diagrams are essential for anyone performing repairs on the T2200’s engine or drive system. They allow for accurate identification and replacement of components.

These are essential for optimal performance.

Electrical System Diagrams

The electrical system diagrams in the Craftsman T2200 parts manual are essential for diagnosing and repairing electrical issues. These diagrams illustrate the wiring layout, component locations, and connections within the tractor’s electrical system. Key components covered include the battery, starter solenoid, ignition switch, and wiring harnesses.

Detailed schematics help users trace circuits, identify faulty components, and ensure correct wiring during repairs. Understanding these diagrams is crucial for safely troubleshooting electrical problems. The manual provides part numbers for replacement electrical components.

These diagrams assist in maintaining the T2200’s electrical system, ensuring reliable starting and operation of electrical accessories. Proper use of the diagrams can prevent costly repairs.

They are an invaluable tool for any owner or technician working on the tractor.

The diagrams help maintain your tractor.

Troubleshooting and Repair Using the Manual

The Craftsman T2200 parts manual aids in troubleshooting and repair by providing diagrams, part numbers, and instructions. It enables users to identify problems, locate replacement parts, and perform repairs effectively, saving time and money.

Identifying Common Problems and Solutions

The Craftsman T2200 parts manual is instrumental in identifying frequent issues. Common problems include engine troubles, such as starting difficulties, often linked to a clogged carburetor, a faulty spark plug, or stale fuel. The manual assists in diagnosing these by offering diagrams and troubleshooting steps.

Mower deck malfunctions, such as uneven cutting, may stem from damaged blades, worn pulleys, or loose fasteners. The parts manual showcases deck component diagrams, aiding in pinpointing and resolving these issues. Furthermore, drive system problems, like belt slippage, might arise from a worn or broken belt.

Electrical problems, such as a faulty battery or alternator, can also cause issues. The manual provides electrical system diagrams for troubleshooting these issues, empowering users to diagnose and fix common problems efficiently.

Using Diagrams for Part Replacement

The Craftsman T2200 parts manual’s diagrams are invaluable for successful part replacement. These diagrams offer exploded views of various tractor systems, including the deck, engine, and electrical components. Each part is labeled with a unique number, cross-referenced in the parts list for easy identification and ordering.

When replacing a damaged or worn part, consult the relevant diagram to understand its location and how it connects to other components; This ensures correct installation and prevents further damage. The diagrams illustrate the proper orientation and sequence for assembling parts.

For instance, replacing mower blades involves referencing the deck diagram to identify blade placement and hardware. Similarly, replacing a drive belt necessitates understanding its path around pulleys using the drive system diagram. Proper diagram usage minimizes errors, saving time and effort during repairs.

Where to Find Craftsman T2200 Parts

Finding Craftsman T2200 parts is straightforward thanks to various retailers. Options range from online suppliers specializing in lawn equipment parts to local dealers and repair shops, ensuring convenient access to necessary replacement components.

Online Retailers and Parts Suppliers

Numerous online retailers and parts suppliers offer a wide selection of Craftsman T2200 parts. These platforms provide convenient access to various components, from engine parts to deck components. Websites often feature detailed parts diagrams and search functions, simplifying the identification and ordering process.

Popular online retailers include Sears PartsDirect, PartSelect, and eBay. These platforms allow customers to search for parts using the model number, ensuring compatibility. Many suppliers also offer detailed product descriptions, customer reviews, and installation guides to assist with repairs.

Consider factors such as shipping costs, delivery times, and return policies when choosing an online retailer. Comparing prices and reading customer feedback can help ensure a satisfactory purchase experience.

Local Dealers and Repair Shops

Local dealers and repair shops represent another valuable resource for sourcing Craftsman T2200 parts. These establishments often maintain an inventory of common replacement parts, such as belts, blades, and filters. Visiting a local dealer offers the advantage of immediate availability and expert assistance.

Local repair shops can provide diagnostic services and perform repairs, ensuring proper installation of parts. They may also offer advice on maintenance practices to prolong the lifespan of your lawn tractor. Building a relationship with a local dealer or repair shop can lead to personalized service and reliable support.

Consider the proximity, reputation, and expertise of local dealers when making your selection. Checking online reviews and seeking recommendations from other Craftsman owners can help you find a trustworthy and knowledgeable provider.

Categories
PDF

social skills worksheets pdf

Social skills involve behaving appropriately in diverse social settings. They encompass interpreting body language and facial expressions. Effective social skills impact how others perceive and treat us, influencing our interactions and relationships.

Social skills enhance confidence, physical development, and school readiness. They are vital for forming friendships and navigating social situations successfully. Mastering social skills improves communication and facilitates positive interactions with others in various environments.

Definition of Social Skills

Social skills refer to the ability to interact effectively and appropriately with others in a variety of social contexts. This encompasses both verbal and non-verbal communication, including the capacity to understand and respond to social cues, such as body language and facial expressions. Social skills also involve the ability to initiate and maintain conversations, express oneself clearly, and listen attentively to others. Furthermore, they include the capacity to navigate social situations with tact, empathy, and respect for others’ perspectives. Individuals with strong social skills can build and maintain positive relationships, resolve conflicts constructively, and adapt their behavior to suit different social settings. These skills are essential for success in personal, academic, and professional life, contributing to overall well-being and fulfillment. Deficient social skills can lead to difficulties in forming relationships, managing conflicts, and achieving personal and professional goals.

Understanding Social Skills

Importance of Social Skills in Daily Life

Social skills play a vital role in nearly every aspect of daily life, influencing our interactions, relationships, and overall well-being. From simple greetings to complex negotiations, social skills enable us to navigate the social world effectively. They are crucial for building and maintaining meaningful relationships with family, friends, and colleagues. Strong social skills facilitate effective communication, allowing us to express our thoughts and feelings clearly while understanding others’ perspectives. In academic settings, social skills contribute to successful collaboration, active participation, and positive interactions with teachers and peers. Professionally, social skills are essential for teamwork, leadership, and building rapport with clients and colleagues. Moreover, social skills help us resolve conflicts constructively, manage emotions effectively, and adapt to different social situations. Lacking these skills can lead to isolation, difficulty in forming relationships, and challenges in achieving personal and professional goals. Thus, cultivating social skills is essential for a fulfilling and successful life.

Social Skills Worksheets: An Overview

What are Social Skills Worksheets?

Social skills worksheets are structured activities designed to improve social interaction abilities. They provide exercises and scenarios to practice communication, empathy, and conflict resolution, fostering better social behaviors.

What are Social Skills Worksheets?

Social skills worksheets are educational resources designed to enhance an individual’s ability to interact effectively and appropriately with others. These worksheets typically contain a variety of activities, exercises, and scenarios aimed at developing specific social competencies. They can address a wide range of skills, including communication, empathy, cooperation, and conflict resolution.

The worksheets often present real-life situations and ask the user to consider how to respond or react in a socially acceptable manner. They may include role-playing exercises, fill-in-the-blank questions, or open-ended prompts that encourage critical thinking about social dynamics. Social skills worksheets can be used in various settings, such as schools, therapy sessions, or at home, to support the development of crucial interpersonal skills. They are valuable tools for individuals seeking to improve their social interactions and build stronger relationships.

Benefits of Using Worksheets

Using social skills worksheets offers numerous benefits for individuals of all ages. These worksheets provide a structured and engaging way to learn and practice essential social competencies. One key benefit is the ability to improve communication skills, enabling individuals to express themselves clearly and effectively. They also foster empathy and understanding by prompting users to consider different perspectives and emotions.

Furthermore, social skills worksheets can help build confidence in social situations, reducing anxiety and promoting positive interactions. They offer a safe space to explore various scenarios and develop appropriate responses. The worksheets can also enhance problem-solving skills, teaching individuals how to navigate conflicts and resolve issues constructively. Regular use of these resources can lead to improved relationships, better teamwork, and increased success in both personal and professional settings. Ultimately, social skills worksheets empower individuals to thrive in a diverse and interconnected world.

Key Social Skills Addressed in Worksheets

Worksheets often target effective communication, teaching clear expression and active listening. They provide structured activities to practice verbal and non-verbal cues for successful interactions in various social contexts.

Communication Skills

Communication skills are fundamental for social interaction, and worksheets offer structured ways to develop them. These resources often include activities focusing on both verbal and non-verbal communication, such as interpreting body language and understanding tone of voice. Effective communication involves expressing oneself clearly and listening attentively to others.

Worksheets can help individuals learn to articulate their thoughts and feelings appropriately, while also developing the ability to understand and respond to the emotions of others. Activities may involve role-playing, scenario analysis, and identifying different communication styles. By practicing these skills, individuals can improve their ability to build relationships, resolve conflicts, and navigate social situations with greater confidence.

Ultimately, mastering communication skills through worksheets can lead to more fulfilling and meaningful interactions in all aspects of life.

Empathy and Understanding

Empathy and understanding are crucial components of social competence, and worksheets can be valuable tools for fostering these skills. These resources often present scenarios and activities designed to help individuals develop the ability to recognize and understand the emotions of others. By exploring different perspectives and considering how others might feel in various situations, individuals can cultivate empathy and improve their social interactions.

Worksheets may include exercises that involve identifying emotions based on facial expressions, body language, and tone of voice. Additionally, they may encourage individuals to reflect on their own experiences and consider how their actions might impact others. Through consistent practice and reflection, individuals can develop a deeper understanding of human emotions and learn to respond with compassion and empathy.

This enhanced emotional intelligence can lead to stronger relationships, improved communication, and a greater sense of connection with others.

Conflict Resolution

Conflict resolution is a vital social skill, and worksheets can provide structured activities for learning effective strategies. These resources often present common conflict scenarios and guide individuals through steps to reach peaceful resolutions. The goal is to teach constructive communication and problem-solving skills, transforming potentially negative interactions into opportunities for growth and understanding.

Worksheets might include role-playing exercises, encouraging individuals to practice active listening, expressing their needs respectfully, and finding mutually agreeable solutions. They can also help in identifying different conflict styles and understanding the impact of one’s own behavior on others. By working through various scenarios and techniques, individuals can build confidence in their ability to navigate disagreements effectively.

Ultimately, these tools empower individuals to de-escalate tense situations, build stronger relationships, and foster a more harmonious environment. Mastering conflict resolution leads to personal growth and improved social interactions.

Finding Free Social Skills Worksheets (PDF)

Numerous online platforms offer free social skills worksheets in PDF format. These resources cater to various age groups and skill levels, providing accessible tools for educators, parents, and individuals seeking to improve social competence.

Online Resources for Free Downloads

Finding free social skills worksheets in PDF format is easier than ever, thanks to the abundance of online resources. Websites dedicated to educational materials, particularly those focusing on special needs and social-emotional learning, often provide a selection of downloadable worksheets. Teachers Pay Teachers is one such platform where educators share resources, many of which are available for free.

Additionally, organizations and institutes specializing in disability and community support may offer free resources, including social skills worksheets designed for diverse learners. These worksheets can be a valuable tool for parents, educators, and therapists looking to support individuals in developing essential social skills. Exploring these online resources allows you to access a wide range of activities and lessons to promote positive social interactions and enhance communication abilities.

Using Social Skills Worksheets Effectively

Incorporate worksheets into daily routines at home and school. Embed teaching social skills within everyday activities. This reinforces learning and helps individuals apply skills in real-world scenarios, promoting practical understanding.

Integrating Worksheets into Daily Activities

To effectively integrate social skills worksheets, embed them into everyday routines both at home and in the classroom. Teaching social skills should be interwoven with daily activities. Use meal times to discuss conversation starters, or incorporate role-playing during playtime to practice empathy. Real-life situations offer invaluable opportunities to apply learned concepts, reinforcing understanding and retention.

Make learning interactive by using games that teach taking turns and managing emotions. Discuss the impact of actions on others after watching television shows or reading books. Encourage children to identify characters’ feelings and consider alternative responses. By connecting worksheets to tangible experiences, social skills become more relevant and easier to grasp. Consistently reinforce positive behaviors and provide constructive feedback to nurture growth and confidence in navigating social interactions.

Adapting Worksheets for Different Age Groups

Adapting social skills worksheets for different age groups is crucial for maximizing their effectiveness. For younger children, use visually appealing worksheets with simple language and engaging illustrations. Focus on basic skills like greeting others and sharing. Incorporate activities that involve role-playing and storytelling to make learning fun.

As children get older, introduce more complex scenarios and abstract concepts. Worksheets for adolescents can address topics like conflict resolution, empathy, and effective communication. Encourage critical thinking and self-reflection by including open-ended questions and real-life examples. Remember to tailor the content to match the developmental stage and cognitive abilities of each age group. Provide support and guidance as needed, and celebrate progress to motivate continued learning and growth in social skills.

Categories
Guide

height guide for bikes

Finding the perfect bike height is crucial for comfort, efficiency, and safety. A properly sized bike ensures a comfortable riding position, reducing strain. Correct height maximizes power transfer, enhancing performance. Safe bike handling depends on appropriate sizing, minimizing accident risks.

Selecting the correct bike height is paramount for an enjoyable and efficient cycling experience. A bike that fits well ensures a comfortable posture, minimizing strain on your back, shoulders, and knees. This not only enhances your riding pleasure but also prevents potential injuries. The right bike height optimizes your pedaling efficiency, allowing you to exert power more effectively. This translates to faster speeds and greater endurance on longer rides.

Furthermore, appropriate bike height plays a significant role in bike handling and control. A bike that’s too large or too small can compromise your balance and maneuverability, increasing the risk of accidents. Having proper standover height ⎯ the clearance between the top tube and your crotch ⎯ ensures you can safely dismount and maintain control in unexpected situations.

Ultimately, taking the time to find the right bike height is an investment in your cycling health, performance, and safety.

Finding the perfect bike height is crucial for comfort, efficiency, and safety. A properly sized bike ensures a comfortable riding position, reducing strain. Correct height maximizes power transfer, enhancing performance. Safe bike handling depends on appropriate sizing, minimizing accident risks.

When navigating the world of bike sizing, it’s essential to understand the fundamental differences between adult and kids’ bikes. Adult bikes are typically sized based on frame size, often measured in centimeters or inches, or designated by sizes like Small, Medium, and Large. This measurement usually corresponds to the distance from the center of the crank to the top of the seat tube.

Conversely, kids’ bikes are primarily sized by wheel diameter, expressed in inches. Common kids’ bike sizes include 12-inch, 16-inch, 20-inch, and 24-inch wheels. This sizing system is based on a child’s height and inseam, ensuring they can comfortably reach the pedals and handlebars.

Therefore, an adult frame size relates to the bike’s overall geometry, whereas a kid’s wheel size reflects the bike’s suitability for a child’s physical proportions.

Bike size charts are essential tools for determining the appropriate frame or wheel size. They correlate rider height with bike dimensions, ensuring a comfortable and efficient fit. These charts vary by bike type, reflecting specific geometry and intended use.

Road bike size charts commonly use centimeters to indicate frame size, with labels like XS, S, M, L, and XL. These charts correlate rider height and inseam to a recommended frame size. Measuring the seat tube is a good starting point for identifying road bike size. However, sizing can vary across brands, so consulting specific manufacturer charts is crucial. Always consider standover height, ensuring adequate clearance. If between sizes, focus on reach, which affects upper body comfort. Professional bike fitting provides the most accurate assessment.

Finding the perfect bike height is crucial for comfort, efficiency, and safety. A properly sized bike ensures a comfortable riding position, reducing strain. Correct height maximizes power transfer, enhancing performance. Safe bike handling depends on appropriate sizing, minimizing accident risks.

When navigating the world of bike sizing, it’s essential to understand the fundamental differences between adult and kids’ bikes; Adult bikes are typically sized based on frame size, often measured in centimeters or inches, or designated by sizes like Small, Medium, and Large. This measurement usually corresponds to the distance from the center of the crank to the top of the seat tube.

Conversely, kids’ bikes are primarily sized by wheel diameter, expressed in inches. Common kids’ bike sizes include 12-inch, 16-inch, 20-inch, and 24-inch wheels. This sizing system is based on a child’s height and inseam, ensuring they can comfortably reach the pedals and handlebars.

Therefore, an adult frame size relates to the bike’s overall geometry, whereas a kid’s wheel size reflects the bike’s suitability for a child’s physical proportions.

Bike size charts are essential tools for determining the appropriate frame or wheel size. They correlate rider height with bike dimensions, ensuring a comfortable and efficient fit. These charts vary by bike type, reflecting specific geometry and intended use.

Road bike size charts commonly use centimeters to indicate frame size, with labels like XS, S, M, L, and XL. These charts correlate rider height and inseam to a recommended frame size. Measuring the seat tube is a good starting point for identifying road bike size. However, sizing can vary across brands, so consulting specific manufacturer charts is crucial. Always consider standover height, ensuring adequate clearance. If between sizes, focus on reach, which affects upper body comfort. Professional bike fitting provides the most accurate assessment.

Mountain bike size charts often use inches or general sizes like S, M, L, and XL. These charts match rider height to a corresponding frame size. Wheel size also plays a role; smaller frames often have 27.5-inch wheels, while larger frames use 29-inch wheels. Rider height and riding style influence wheel choice. Smaller riders may prefer smaller wheels for control. Consult specific brand charts due to variations in geometry. Standover height is crucial for safety. Professional fitting ensures optimal performance.

Finding the perfect bike height is crucial for comfort, efficiency, and safety. A properly sized bike ensures a comfortable riding position, reducing strain. Correct height maximizes power transfer, enhancing performance. Safe bike handling depends on appropriate sizing, minimizing accident risks.

When navigating the world of bike sizing, it’s essential to understand the fundamental differences between adult and kids’ bikes. Adult bikes are typically sized based on frame size, often measured in centimeters or inches, or designated by sizes like Small, Medium, and Large. This measurement usually corresponds to the distance from the center of the crank to the top of the seat tube.

Conversely, kids’ bikes are primarily sized by wheel diameter, expressed in inches. Common kids’ bike sizes include 12-inch, 16-inch, 20-inch, and 24-inch wheels. This sizing system is based on a child’s height and inseam, ensuring they can comfortably reach the pedals and handlebars.

Therefore, an adult frame size relates to the bike’s overall geometry, whereas a kid’s wheel size reflects the bike’s suitability for a child’s physical proportions.

Bike size charts are essential tools for determining the appropriate frame or wheel size. They correlate rider height with bike dimensions, ensuring a comfortable and efficient fit. These charts vary by bike type, reflecting specific geometry and intended use.

Road bike size charts commonly use centimeters to indicate frame size, with labels like XS, S, M, L, and XL. These charts correlate rider height and inseam to a recommended frame size. Measuring the seat tube is a good starting point for identifying road bike size. However, sizing can vary across brands, so consulting specific manufacturer charts is crucial. Always consider standover height, ensuring adequate clearance. If between sizes, focus on reach, which affects upper body comfort. Professional bike fitting provides the most accurate assessment.

Mountain bike size charts often use inches or general sizes like S, M, L, and XL. These charts match rider height to a corresponding frame size. Wheel size also plays a role; smaller frames often have 27.5-inch wheels, while larger frames use 29-inch wheels. Rider height and riding style influence wheel choice. Smaller riders may prefer smaller wheels for control. Consult specific brand charts due to variations in geometry. Standover height is crucial for safety. Professional fitting ensures optimal performance.

Hybrid bike size charts accommodate their versatile nature, often employing S/M/L designations, although some brands use inches. These charts correlate rider height to frame size, ensuring a comfortable upright riding position. Hybrid bikes prioritize comfort and efficiency for various terrains. Standover height remains important for safety. Frame geometry is designed for general use. If between sizes, consider your riding style—more upright or aggressive. Consulting brand-specific charts is advisable due to sizing variations. Professional advice ensures the best fit for your needs. Inseam measurements can further refine size selection.

Kids bike size charts primarily use wheel size (in inches) to determine the appropriate bike for a child’s height. Typical wheel sizes range from 12 to 24 inches. These charts correlate a child’s height and inseam to the ideal wheel size. It’s crucial to consider the child’s comfort and confidence on the bike. Always allow the child to test ride the bike if possible. Sizing up is generally better, but only if the child can comfortably handle the larger size. Consult multiple charts as sizing can vary slightly between brands. A professional fitting ensures the best and safest fit.

Bike Height Guide: Finding the Perfect Fit

Finding the perfect bike height is crucial for comfort, efficiency, and safety. A properly sized bike ensures a comfortable riding position, reducing strain. Correct height maximizes power transfer, enhancing performance. Safe bike handling depends on appropriate sizing, minimizing accident risks.

Adult vs. Kids Bikes: Sizing Systems

When navigating the world of bike sizing, it’s essential to understand the fundamental differences between adult and kids’ bikes. Adult bikes are typically sized based on frame size, often measured in centimeters or inches, or designated by sizes like Small, Medium, and Large. This measurement usually corresponds to the distance from the center of the crank to the top of the seat tube.
Conversely, kids’ bikes are primarily sized by wheel diameter, expressed in inches. Common kids’ bike sizes include 12-inch, 16-inch, 20-inch, and 24-inch wheels. This sizing system is based on a child’s height and inseam, ensuring they can comfortably reach the pedals and handlebars.
Therefore, an adult frame size relates to the bike’s overall geometry, whereas a kid’s wheel size reflects the bike’s suitability for a child’s physical proportions.

Understanding Bike Size Charts

Bike size charts are essential tools for determining the appropriate frame or wheel size. They correlate rider height with bike dimensions, ensuring a comfortable and efficient fit. These charts vary by bike type, reflecting specific geometry and intended use.

Road Bike Size Chart: Centimeters and Labels

Road bike size charts commonly use centimeters to indicate frame size, with labels like XS, S, M, L, and XL. These charts correlate rider height and inseam to a recommended frame size. Measuring the seat tube is a good starting point for identifying road bike size. However, sizing can vary across brands, so consulting specific manufacturer charts is crucial. Always consider standover height, ensuring adequate clearance. If between sizes, focus on reach, which affects upper body comfort. Professional bike fitting provides the most accurate assessment.

Mountain Bike Size Chart: Inches and S/M/L

Mountain bike size charts often use inches or general sizes like S, M, L, and XL. These charts match rider height to a corresponding frame size. Wheel size also plays a role; smaller frames often have 27.5-inch wheels, while larger frames use 29-inch wheels. Rider height and riding style influence wheel choice. Smaller riders may prefer smaller wheels for control. Consult specific brand charts due to variations in geometry. Standover height is crucial for safety. Professional fitting ensures optimal performance.

Hybrid Bike Size Chart: Versatility in Sizing

Hybrid bike size charts accommodate their versatile nature, often employing S/M/L designations, although some brands use inches. These charts correlate rider height to frame size, ensuring a comfortable upright riding position. Hybrid bikes prioritize comfort and efficiency for various terrains. Standover height remains important for safety. Frame geometry is designed for general use. If between sizes, consider your riding style—more upright or aggressive. Consulting brand-specific charts is advisable due to sizing variations. Professional advice ensures the best fit for your needs. Inseam measurements can further refine size selection.

Kids Bike Size Chart: Wheel Size and Height

Kids bike size charts primarily use wheel size (in inches) to determine the appropriate bike for a child’s height. Typical wheel sizes range from 12 to 24 inches. These charts correlate a child’s height and inseam to the ideal wheel size. It’s crucial to consider the child’s comfort and confidence on the bike. Always allow the child to test ride the bike if possible; Sizing up is generally better, but only if the child can comfortably handle the larger size. Consult multiple charts as sizing can vary slightly between brands. A professional fitting ensures the best and safest fit.

Factors Affecting Bike Size Choice

Height and Inseam: Key Measurements

Height and inseam are fundamental in selecting the correct bike size. Height determines overall frame size suitability. Inseam dictates standover height and seat adjustment range. Accurate measurements ensure comfort and prevent injury. Consult size charts correlating these metrics.

Categories
Instructions

black and decker rice steamer instructions

Black and Decker Rice Steamer Instructions: A Comprehensive Guide

This guide provides comprehensive instructions for using your Black and Decker rice steamer. Learn how to operate your appliance, from selecting the right settings to cleaning and maintaining it. Ensure optimal performance and delicious results every time.

Black and Decker rice steamers offer a convenient and efficient way to cook rice and steam vegetables. Designed for simplicity, these appliances eliminate the hassle of stovetop cooking, preventing boil-overs and scorched rice. Many models feature automatic keep-warm functions, ensuring your rice stays ready to serve. With user-friendly interfaces and dishwasher-safe components, Black and Decker rice steamers are a practical addition to any kitchen, making meal preparation easier and cleanup a breeze. Whether you’re cooking rice or steaming vegetables, these steamers provide consistent and reliable results.

Understanding Your Black and Decker Rice Steamer Model

Familiarizing yourself with your specific Black and Decker rice steamer model is crucial. This ensures you utilize the correct settings and accessories for optimal cooking results.

Identifying Your Specific Model Number

Locating your Black and Decker rice steamer’s model number is essential for accessing the correct user manual and replacement parts. Typically, the model number is found on a sticker located on the bottom or back of the appliance. This identification enables you to find specific instructions, troubleshooting tips, and compatible accessories tailored to your exact steamer version. Knowing the model number ensures optimal performance and safe usage.

Accessing the User Manual (Online and Physical Copies)

If you’ve misplaced your physical user manual, accessing a digital copy is simple. Visit the Black and Decker website and navigate to the “Support” or “Manuals” section. Enter your model number to find and download the PDF version of the manual. Alternatively, search online using your model number followed by “user manual”. Several websites offer free downloads, ensuring you have the necessary information for safe and efficient operation of your rice steamer.

Step-by-Step Instructions for Rice Cooking

Follow these instructions for perfect rice every time. This section covers measuring, preparing, setting the timer, and starting your Black and Decker rice steamer for optimal results.

Measuring Rice and Water Ratios

Achieving perfectly cooked rice starts with the right proportions. Generally, a 1:1 rice to water ratio works for most white rice. Use the measuring cup provided with your Black and Decker rice steamer for accurate measurements. For example, if cooking 1.5 cups of rice, use 1.75 cups of water. Refer to your steamer’s manual for specific ratios for brown rice or other varieties, ensuring consistently fluffy and delicious rice.

Preparing the Rice for Cooking (Rinsing)

Rinsing rice before cooking is a crucial step for achieving the best texture. Thoroughly wash the rice under cold running water to remove excess starch. This helps prevent the rice from becoming sticky and gummy during the steaming process. Continue rinsing until the water runs clear. This ensures each grain cooks separately, resulting in fluffy, well-defined rice.

Setting the Timer and Starting the Steamer

Once the rice and water are in the rice bowl, and the bowl is placed inside the steamer, securely fasten the lid. Refer to your Black and Decker model’s user manual for recommended steaming times based on the type and quantity of rice you are cooking. Set the timer accordingly. Plug the unit into a standard electrical outlet. The steamer will automatically begin cooking, and some models feature an automatic keep-warm function.

Steaming Vegetables and Other Foods

Beyond rice, your Black and Decker steamer can cook vegetables and more. Explore its versatility for preparing healthy meals by steaming various foods to perfection, retaining their nutrients and flavors.

Using Steaming Baskets and Accessories

Maximize your Black and Decker rice steamer’s capabilities by utilizing steaming baskets and accessories effectively. These components allow for steaming multiple food items simultaneously, ensuring even cooking and flavor retention. Refer to your user manual to understand the function of each accessory. Properly placing the rice bowl into the steaming bowl is crucial. Remember, the basket is not for cooking meat. Ensure all parts are assembled correctly before operation.

Recommended Steaming Times for Various Vegetables

Achieve perfectly steamed vegetables with your Black and Decker rice steamer by following recommended steaming times. Different vegetables require varying durations to reach optimal tenderness. Consult the user manual for a detailed guide on steaming times for common vegetables. Remember that the timer can be set from 1 to 75 minutes. Factors like size and freshness can impact cooking time, so adjust accordingly. Regularly check for desired doneness.

Cleaning and Maintenance

Proper cleaning and maintenance are crucial for extending the life of your Black and Decker rice steamer. Regular cleaning prevents buildup and ensures optimal performance. Refer to the following sections for detailed instructions.

Cleaning the Rice Bowl and Steaming Components

To maintain your Black and Decker rice steamer, clean the rice bowl and steaming components regularly. Ensure the appliance is unplugged and cooled before cleaning. Wash the rice bowl, steaming basket, and lid with warm, soapy water. Use a non-abrasive sponge to avoid scratching the non-stick coating of the rice bowl. Rinse thoroughly and dry all parts completely before reassembling. The rice bowl and steaming basket are often dishwasher-safe for added convenience. Consult your user manual for specific dishwasher compatibility. Avoid using harsh chemicals.

Descaling the Steamer (if applicable)

If your Black and Decker rice steamer accumulates mineral deposits, descaling may be necessary. These deposits can affect performance. To descale, mix equal parts white vinegar and water. Pour the mixture into the steamer’s water reservoir. Run the steamer through a full steaming cycle without rice. Repeat if needed. Afterwards, run a cycle with fresh water only to rinse thoroughly. Ensure all vinegar residue is removed. Regular descaling helps maintain the steamer’s efficiency and prolongs its lifespan, but not all models require it.

Troubleshooting Common Issues

Encountering problems with your Black and Decker rice steamer? This section addresses common issues. Find solutions for rice that’s not cooked properly or a steamer that won’t turn on, ensuring smooth operation.

Rice Not Cooked Properly

If your rice isn’t cooking properly in your Black and Decker rice steamer, several factors could be at play. Ensure you’re using the correct rice-to-water ratio as specified in your user manual; often, too little or too much water is the culprit. Also, verify that the steamer is placed on a flat, level surface for even cooking. Check the timer setting and adjust accordingly based on the type of rice you’re using. Make sure the lid is tightly sealed to maintain proper steaming. Sometimes, the heating element may need inspection or the steamer requires descaling.

Steamer Not Turning On

If your Black and Decker rice steamer fails to power on, start by confirming it’s properly plugged into a functioning electrical outlet. Check the power cord for any signs of damage. Next, ensure the timer is correctly set, as some models require the timer to be engaged for the unit to start. Also, inspect the base for any obstructions or debris that might prevent proper contact. If these steps don’t work, the internal fuse or heating element may have failed, requiring professional repair or replacement. Always consult your user manual for specific troubleshooting steps.

Safety Precautions

Prioritize safety when using your Black and Decker rice steamer. Always use caution to avoid burns from steam and hot surfaces. Ensure proper electrical safety to prevent shocks. Following these precautions ensures safe operation.

Avoiding Burns and Electrical Shock

To prevent burns, always use oven mitts when handling hot components of the Black and Decker rice steamer. Be cautious of escaping steam, especially when opening the lid. Never immerse the base unit, cord, or plug in water to avoid electrical shock. Ensure the unit is unplugged before cleaning. Regularly inspect the cord for damage and avoid using the steamer if any damage is present. Prioritize your safety by following these guidelines while operating the appliance.

Proper Handling of Hot Surfaces

When using your Black and Decker rice steamer, exercise caution with hot surfaces. Always use oven mitts or pot holders when handling the rice bowl, steaming baskets, and the steamer lid. Avoid touching the exterior of the steamer during operation, as it can become very hot. Allow the unit to cool completely before cleaning or storing. Keep children away from the steamer during and immediately after use to prevent accidental burns. Prioritize safety by following these precautions.

Recipes and Cooking Tips

Explore a variety of recipes and cooking tips to maximize your Black and Decker rice steamer’s potential. From sushi rice to flavorful vegetable medleys, discover new ways to create delicious meals effortlessly.

Sushi Rice Preparation

To prepare sushi rice in your Black and Decker steamer, accurately measure sushi rice and water, combining them in the rice bowl. Stir at the minimum time specified for small-grain rice. After steaming, enhance the flavor by adding chopped onion, parsley, or mushrooms. Ensure the rice is properly rinsed to remove excess starch before cooking. Achieving the perfect sticky yet fluffy texture is key for authentic sushi. Follow these steps for delicious sushi rice every time!

Adding Flavors and Spices

Enhance your rice dishes by adding flavors and spices directly to the rice bowl before steaming. Consider incorporating herbs like thyme or rosemary, or spices such as cumin or curry powder, to infuse the rice with aromatic notes. Broth can be used instead of water for a richer flavor. For a sweeter touch, add a pinch of sugar or a drizzle of honey. Experiment with different combinations to create personalized and flavorful rice creations. Ensure spices are evenly distributed for consistent taste.

Finding Replacement Parts and Accessories

Locate genuine replacement parts and accessories for your Black and Decker rice steamer online. Explore options for bowls, steaming baskets, and lids to maintain your appliance’s functionality and extend its lifespan.

Identifying and Ordering Genuine Replacement Parts

To ensure optimal performance and longevity of your Black and Decker rice steamer, it’s crucial to identify and order genuine replacement parts. Start by locating the model number of your steamer, typically found on a sticker at the base or back of the unit. Once you have the model number, visit the official Black and Decker website or authorized parts retailers. Search for parts specifically designed for your model to guarantee compatibility. Carefully review the part descriptions and images to confirm they match your needs before placing your order.

Categories
PDF

shiva rudram pdf

Shiva Rudram: An Overview

Sri Rudram, a revered Vedic hymn dedicated to Lord Shiva, is extracted from the Krishna Yajurveda. It’s a powerful prayer with two parts, Namakam and Chamakam. Many resources, including PDFs, are available for devotees to download and understand its profound meaning.

Sri Rudram is a sacred prayer to Lord Rudra (Shiva), found in the Yajur Veda. It is available in various languages and formats, including PDF. This hymn invokes blessings and seeks protection, offering a path to inner peace.

Vedic Origins and Significance

Sri Rudram, originating from the Krishna Yajurveda’s Taittiriya Samhita, holds immense Vedic significance. It’s a powerful hymn dedicated to Lord Shiva, revered for its ability to bestow peace and harmony. The availability of Sri Rudram in PDF format allows for wider accessibility and study. Chanting and listening to it are considered highly auspicious. Its structure, divided into eleven Anuvakas, guides devotees through profound invocations. The mantras within Sri Rudram are believed to destroy evil, leading to bliss and spiritual growth. Learning resources, including PDFs, aid in understanding its deeper meaning.

Sri Rudram in the Yajur Veda

Sri Rudram, a significant Vedic mantra, is found within the Krishna Yajur Veda. Its presence underscores its importance. PDF versions are available for download, aiding in the study and recitation of this sacred hymn dedicated to Lord Shiva.

Taittiriya Samhita Reference

The Sri Rudram finds its precise location within the vast expanse of the Krishna Yajurveda, specifically residing within the Taittiriya Samhita. Devotees seeking to delve into the authentic Vedic source of this powerful hymn will find it in chapters four and seven of the Taittiriya Samhita (TS 4.5, 4.7). This reference point allows scholars and practitioners to trace the mantra back to its origins, ensuring accurate understanding and recitation. PDF versions often cite this reference, enabling easier navigation within the Vedic texts. This precise location solidifies the hymn’s Vedic authority and facilitates deeper study.

Namakam and Chamakam

Sri Rudram comprises two parts: Namakam, which praises Lord Shiva, and Chamakam, which seeks blessings. Both are available in PDF format for easy access. These sections complement each other in the sacred prayer.

Two Parts of Sri Rudram

The Sri Rudram is traditionally divided into two significant sections known as Namakam and Chamakam. The Namakam extols Lord Shiva through various epithets and praises his divine attributes, seeking his presence and blessings. Conversely, the Chamakam focuses on seeking boons and blessings from Lord Shiva for overall well-being, prosperity, and spiritual growth.

Both Namakam and Chamakam are essential components of the complete Sri Rudram recitation, and PDF versions are readily available for download. These PDF resources often include the Sanskrit text, transliterations, and translations.

Rudra: An Epithet of Shiva

Rudra, a name for Shiva, signifies both terror and benevolence. The Sri Rudram venerates these aspects. PDF versions of the hymn help devotees understand Rudra’s qualities and seek blessings, protection, and forgiveness.

Rudra’s Terrifying and Benevolent Aspects

Lord Rudra, an epithet of Shiva, embodies contrasting qualities: a terrifying force that destroys evil and a benevolent deity that bestows blessings. This duality is central to understanding Sri Rudram. The hymns within the Sri Rudram acknowledge and praise both the destructive and compassionate sides of Rudra, seeking his favor in all forms. Devotees can explore these aspects further through readily available PDF resources, which offer translations and commentaries on the sacred verses, shedding light on the complex nature of Rudra as both a destroyer and a protector.

Sri Rudram and its Eleven Anuvakas

Sri Rudram is structured into eleven sections called Anuvakas. Each Anuvaka offers unique prayers to Rudra. Many PDF versions are available which provide the structure and content of each Anuvaka for better understanding.

Structure and Content of Each Anuvaka

Each of the eleven Anuvakas within the Sri Rudram possesses a distinct structure and content, contributing to the hymn’s comprehensive praise of Lord Shiva. The initial Anuvakas often focus on invoking Rudra’s presence and seeking forgiveness. Later sections elaborate on His various attributes and manifestations. Many PDF resources provide detailed explanations of each Anuvaka, aiding devotees in understanding the specific prayers and their intended meanings. These PDFs often include transliterations and translations, making the study of Sri Rudram more accessible. By exploring these resources, one can gain deeper insights into the rich tapestry of Vedic wisdom contained within each Anuvaka.

Benefits of Chanting Sri Rudram

Chanting Sri Rudram brings peace, harmony, and blessings. Devotees can download PDF versions to learn and recite. Recitation is believed to destroy evil, bestow bliss, and foster community well-being, according to Vedic tradition.

Peace, Harmony and Blessings

The recitation of Sri Rudram is considered highly auspicious, bestowing profound peace upon the chanter and their surroundings. It is believed to harmonize the environment, dispelling negativity and fostering positive vibrations. This sacred hymn invokes the benevolent aspect of Lord Shiva, leading to blessings of prosperity, health, and spiritual growth. Access to PDF versions allows devotees to easily engage with this powerful prayer, experiencing its transformative effects. Regular chanting is said to bring protection from misfortune and pave the path towards inner fulfillment and divine grace. The availability of Sri Rudram in PDF format ensures its accessibility.

Sri Rudram PDF Downloads

Numerous websites offer Sri Rudram PDF downloads, providing devotees access to the sacred text. These resources enable personal study and chanting, fostering deeper connection with Lord Shiva. PDF versions are readily available online.

Availability of PDF Resources

Sri Rudram, a profound Vedic hymn dedicated to Lord Shiva, has numerous PDF resources readily available online. These PDFs offer devotees easy access to the complete text of the Namakam and Chamakam, the two integral parts of Sri Rudram. These digital versions facilitate convenient study, recitation, and understanding of the sacred mantras. Many websites and online libraries host these PDFs, often providing translations and commentaries alongside the original Sanskrit verses. This widespread availability ensures that individuals across the globe can engage with the transformative power of Sri Rudram, fostering spiritual growth and inner peace through accessible digital formats.

Languages of Sri Rudram

Sri Rudram, primarily in Sanskrit, is accessible in various languages. Translations, including English and other Indian languages, enhance understanding. These versions, often in PDF format, aid global devotees in connecting with the sacred hymn dedicated to Lord Shiva.

Sanskrit, English and Other Indian Languages

Sri Rudram, originating in Sanskrit, is available in multiple languages to facilitate understanding and recitation. Translations into English and various Indian languages like Telugu, Tamil, Kannada, and Malayalam are commonly found. These versions often accompany PDF resources, allowing devotees worldwide to engage with this sacred hymn dedicated to Lord Shiva. The availability of Sri Rudram in diverse languages ensures that its profound spiritual message reaches a broader audience, fostering deeper devotion and comprehension among practitioners regardless of their linguistic background. Access to these translated materials, frequently offered as free PDF downloads, further promotes the widespread dissemination of this powerful Vedic chant.

Prayers and Invocations

Sri Rudram encompasses powerful prayers and invocations to Lord Shiva, seeking protection, blessings, and forgiveness. These sacred verses, often available in PDF form, guide devotees in their supplications for well-being and spiritual growth.

Seeking Protection and Forgiveness

Within the sacred verses of Sri Rudram, prayers and invocations serve as a means to seek divine protection from Lord Shiva. Devotees chant these mantras, often accessing them through PDF resources, to shield themselves from negativity and misfortune. The hymn also facilitates seeking forgiveness for transgressions, fostering spiritual purification. The heartfelt recitations aim to invoke Shiva’s benevolent grace, ensuring safety and redemption. By understanding the deeper meaning behind these prayers, readily available in commentaries accompanying the PDFs, individuals can connect with the divine and receive blessings, peace, and harmony.

Recitation and Learning Resources

For those seeking to learn and recite Sri Rudram, numerous online resources are available. These include PDF versions of the text, as well as MP3 audio files to aid pronunciation and memorization, thus facilitating deeper engagement with this sacred hymn.

Online and MP3 Versions

Accessing Sri Rudram has become increasingly convenient with the availability of online and MP3 versions. Several websites and apps offer the complete text of Sri Rudram in various formats, including PDFs, allowing devotees to read and follow along. Moreover, numerous recordings of the hymn, recited by experienced priests and scholars, are readily accessible as MP3 files. These audio resources are invaluable for learning the correct pronunciation and intonation of the mantras. Many sites provide free downloads of both the text and audio, making Sri Rudram accessible to a global audience seeking spiritual enrichment.

Sri Rudram Mantras

Sri Rudram is composed of powerful mantras that invoke Lord Shiva’s blessings. Key mantras like “Namah Shivaya” are frequently chanted. PDF versions often provide the text of these mantras along with their meanings.

Key Mantras and their Meanings

Sri Rudram contains potent mantras, each resonating with specific energies and meanings that deepen our connection with Lord Shiva. Key among them is “Om Namo Bhagavate Rudraya,” a fundamental invocation expressing reverence.

The phrase “Namaste Rudra Manyave” signifies salutations to Rudra’s anger, acknowledging both his fierce and benevolent aspects. The availability of Sri Rudram PDF resources aids in understanding these profound mantras, offering translations and commentaries that unlock their deeper spiritual essence.

These resources illuminate the significance of each mantra, fostering a more meaningful and transformative chanting experience for devotees.

Commentaries and Translations

Numerous commentaries and translations exist for Sri Rudram, offering deeper insights into its profound meaning. Many resources, including PDF versions, provide access to these interpretations, aiding devotees in understanding the hymn’s spiritual significance.

Understanding the Deeper Meaning

To truly grasp the essence of Sri Rudram, delving into its deeper meaning is essential. The hymn, available in PDF format for easy access, contains layers of symbolism and philosophical concepts. Commentaries by scholars like Dr. R.L. Kashyap offer invaluable insights into the Vedic origins and spiritual significance of each mantra. These resources aid in deciphering the hymn’s underlying messages about the all-pervading Brahman and the various aspects of Lord Shiva. Studying these interpretations allows devotees to connect with the prayer on a profounder level, unlocking its transformative power and experiencing its blissful essence.

Categories
PDF

hispanic heritage month lesson plans pdf

Hispanic Heritage Month: Lesson Plans & Activities

Get ready to celebrate Hispanic Heritage Month! This guide provides lesson plans and activities to help students explore Hispanic culture. Discover creative ways to engage students in learning about history, traditions, and contributions. Integrate activities to promote inclusion, acceptance, and tolerance in the classroom while celebrating the rich heritage.

What is Hispanic Heritage Month?

Hispanic Heritage Month is a period dedicated to celebrating the rich culture, history, and invaluable contributions of Hispanic Americans to the United States. It’s a time to honor the achievements of individuals with ancestry tracing back to Spain, Mexico, Central and South America, and the Caribbean.

This month-long celebration provides an opportunity to delve into the diverse traditions, languages, arts, music, and literature that have enriched American society. It acknowledges the profound impact of Hispanic individuals in various fields, including science, arts, politics, sports, and business.

Hispanic Heritage Month also serves as a platform to promote inclusivity, understanding, and appreciation for the diverse cultural tapestry of the United States. It is a chance to recognize the ongoing struggles and triumphs of the Hispanic community while fostering a sense of unity and respect among all Americans.

Through educational programs, community events, and cultural activities, Hispanic Heritage Month aims to raise awareness about the historical significance and contemporary relevance of Hispanic culture in American society. Ultimately, it’s about fostering a deeper understanding and appreciation for the rich tapestry of cultures that make the United States so unique and vibrant.

Dates and Significance of Hispanic Heritage Month

Hispanic Heritage Month is observed annually from September 15th to October 15th in the United States. The timing is significant, as it coincides with the independence anniversaries of several Latin American countries. Costa Rica, El Salvador, Guatemala, Honduras, and Nicaragua all celebrate their independence on September 15th.

Furthermore, Mexico celebrates its independence on September 16th, and Chile on September 18th. The selection of this period allows for the recognition of multiple independence days within a single month-long celebration, highlighting the shared heritage and historical ties of many Hispanic nations.

The significance of Hispanic Heritage Month lies in its ability to promote awareness and appreciation for the contributions of Hispanic Americans to the United States. It provides a platform to showcase the rich cultural traditions, languages, and histories of the Hispanic community. Moreover, it serves as a reminder of the ongoing struggle for equality and representation faced by Hispanic Americans throughout history.

By celebrating Hispanic Heritage Month, we acknowledge the vital role that Hispanic individuals have played in shaping American society and enriching its cultural landscape. It’s an opportunity to foster understanding, inclusivity, and respect for the diverse backgrounds and experiences of all Americans.

Importance of Celebrating Hispanic Heritage in Schools

Celebrating Hispanic Heritage Month in schools holds immense importance for fostering inclusivity and enriching the educational experience for all students. With Hispanic students comprising a significant portion of the student population, particularly in elementary schools, recognizing and celebrating their heritage is crucial for creating a welcoming and supportive learning environment.

By incorporating Hispanic culture, history, and contributions into the curriculum, schools can provide Hispanic students with a sense of belonging and pride in their identity. This representation not only validates their experiences but also encourages them to engage more actively in their education.

Furthermore, celebrating Hispanic Heritage Month offers all students the opportunity to learn about different cultures and perspectives. It promotes cross-cultural understanding and empathy, which are essential skills for navigating an increasingly diverse world. Through exposure to Hispanic art, literature, music, and traditions, students can develop a broader worldview and appreciate the richness of human diversity.

Moreover, celebrating Hispanic Heritage Month can help combat stereotypes and misconceptions about the Hispanic community. By highlighting the achievements and contributions of Hispanic individuals throughout history, schools can challenge negative stereotypes and promote a more accurate and nuanced understanding of Hispanic culture. This, in turn, can contribute to a more inclusive and equitable society.

Activities: Exploring Spanish-Speaking Countries

Engage students in exciting activities that explore the diverse tapestry of Spanish-speaking countries, fostering a deeper understanding of their cultures, geography, and traditions. Embark on a virtual journey by selecting a country for the entire class or assigning different countries to small groups, encouraging collaborative learning and exploration.

For younger students, spark creativity by having them draw the country’s flag, capturing its symbolism and colors. Older students can create detailed maps showcasing major cities, landmarks, and geographical features, enhancing their spatial reasoning skills.

Organize an internet scavenger hunt, challenging students to unearth fascinating facts about each country, such as its capital city, population, government structure, and primary industries. This activity promotes research skills and critical thinking;

Encourage practical application of knowledge by tasking students with planning a virtual trip to their assigned country. They can research must-see sites, transportation options, and accommodation choices, enhancing their planning and problem-solving abilities. To integrate math skills, have them calculate the estimated cost of the trip, fostering financial literacy.

These activities provide a dynamic and interactive way for students to delve into the rich cultures of Spanish-speaking countries, fostering a global perspective and appreciation for diversity.

Virtual Field Trips to Hispanic Cultural Sites

Immerse your students in the vibrant world of Hispanic culture through captivating virtual field trips to iconic landmarks and cultural sites. Bring history and art to life by exploring renowned museums and historical locations from the comfort of your classroom.

Embark on a virtual tour of the National Museum of the American Latino, delving into the rich history and contributions of Latinos in the United States. Discover artifacts, exhibits, and stories that illuminate the diverse experiences of this community.

Step into the world of Frida Kahlo with a virtual visit to Casa Azul, her iconic home in Mexico City. Explore the vibrant colors, unique architecture, and personal artifacts that shaped her artistic vision.

Utilize Google Earth to embark on a virtual exploration of historical sites across the Hispanic world. Journey to Machu Picchu in Peru, marveling at the ancient Inca citadel nestled high in the Andes Mountains. Explore the San Juan National Historic Site in Puerto Rico, witnessing the fortifications that protected the island for centuries.

Visit the Salinas Pueblo Missions National Monument in New Mexico, learning about the interaction between Spanish missionaries and Native American communities. Conclude your virtual journey at the Freedom Tower in Miami, Florida, a symbol of hope and freedom for Cuban refugees.

Research Projects on Influential Hispanic Figures

Inspire your students by delving into the lives and accomplishments of influential Hispanic figures who have shaped history, culture, and society. Encourage them to explore the stories of individuals who have made significant contributions in various fields, from arts and literature to science and politics.

Assign each student to select a Hispanic figure who resonates with them and conduct in-depth research on their life, work, and impact. Encourage students to explore primary and secondary sources, including biographies, articles, and documentaries, to gain a comprehensive understanding of their chosen figure.

Once their research is complete, challenge students to present their findings in a creative and engaging manner. They could create a poster highlighting key achievements, design an infographic showcasing important facts, write a song celebrating their figure’s legacy, or deliver an oral presentation sharing their insights.

Encourage students to think critically about the challenges and triumphs faced by their chosen figure, and to reflect on the lessons that can be learned from their experiences. By engaging with these stories, students can develop a deeper appreciation for the diversity and richness of Hispanic heritage.

Provide a list of updated and current celebrities for students to choose from, ensuring that they have access to a wide range of inspiring role models.

Literature: Books Celebrating Hispanic Culture

Expand your classroom library with a diverse collection of books that celebrate Hispanic culture, traditions, and experiences. These books can serve as windows into different worlds, allowing students to explore the richness and complexity of Hispanic heritage through engaging narratives and vibrant illustrations.

Introduce students to a variety of genres, including picture books, chapter books, and novels, that feature Hispanic characters, settings, and themes. Select books that showcase the diversity of Hispanic cultures, representing different countries, regions, and communities.

Encourage students to explore themes of identity, family, community, and resilience through the stories they read. Facilitate discussions about the challenges and triumphs faced by Hispanic characters, and help students connect these stories to their own lives and experiences.

Incorporate award-winning books, such as those recognized by the Pura Belpré Award, which honors Latino authors and illustrators whose work best portrays, affirms, and celebrates the Latino cultural experience. These books offer exceptional examples of storytelling and artistic expression.

Consider reading books in both English and Spanish to promote language learning and cultural understanding. Use the illustrations to help students guess the meaning of unfamiliar words and phrases. Explore stories with themes related to family, community, and cultural pride.

Guest Speakers: Connecting with the Local Community

Invite guest speakers from the local community to share their experiences and perspectives on Hispanic culture. This provides students with opportunities to connect with real-life role models and gain firsthand insights into the richness and diversity of Hispanic heritage.

Reach out to local leaders, business owners, artists, and community activists who identify as Hispanic or have expertise in Hispanic culture. Encourage them to share their personal stories, family traditions, and contributions to the community.

Prepare students for the guest speaker’s visit by researching their background and accomplishments. Brainstorm questions to ask the speaker about their experiences, challenges, and successes. Encourage students to actively listen and take notes during the presentation.

During the Q&A session, facilitate a respectful and engaging dialogue between the students and the guest speaker. Encourage students to ask thoughtful questions that demonstrate their curiosity and interest in learning more about Hispanic culture.

After the guest speaker’s visit, have students reflect on what they learned and how it impacted their understanding of Hispanic heritage. Encourage them to write thank-you notes to the speaker expressing their appreciation and highlighting key takeaways from the presentation. Use insights gained as part of a class project.

Music and Dance: Exploring Latin Rhythms

Immerse your students in the vibrant world of Latin music and dance, showcasing how Hispanic Americans have enriched our nation’s culture. From the infectious rhythms of salsa to the soulful melodies of mariachi, Latin music offers a unique and captivating experience.

Introduce students to a variety of Latin musical genres, exploring their origins, cultural significance, and key characteristics. Discuss the instruments commonly used in Latin music, such as the guitar, trumpet, percussion instruments, and accordion. Play recordings of famous Latin musicians and encourage students to identify the different instruments and rhythms.

Teach your class a simple Spanish song with accompanying movements and visuals to aid in memorization. Explore music from different Latin American countries and encourage students to identify the distinctions. Turn it into a game where they guess the instruments being played.

Introduce students to popular Latin dances, such as salsa, merengue, bachata, and cumbia. Demonstrate basic steps and encourage students to participate in a fun and interactive dance lesson. Discuss the cultural context of each dance and its significance within Hispanic communities. This will engage their whole body in learning.

Games and Crafts: Hands-on Cultural Experiences

Engage students in hands-on cultural experiences through traditional Hispanic games and crafts, fostering a deeper appreciation for the diverse cultures within the Hispanic community. Introduce a traditional Hispanic game to show them how different cultures have fun. Consider games like “LoterĂ­a,” a Latin American version of bingo, using pictures instead of numbers to enhance engagement.

Play “Mar y Tierra,” a game similar to Simon Says, where students jump to designated sides representing the sea and land, promoting quick thinking and concentration. Engage students in “Los Numeros,” a math-based game where they form groups according to numbers called out in Spanish, reinforcing language skills and teamwork.

For a creative craft activity, introduce “Papel Picado,” the art of creating intricate paper cuttings used to decorate streets during special occasions like DĂ­a de Muertos. Provide students with colorful tissue paper and templates to design their own “Papel Picado” banners, fostering artistic expression and cultural awareness.

Explore “Luminarias,” traditional paper lanterns made during Christmastime, by having students decorate paper bags with stencils and hole punchers, creating festive and personalized lanterns. These activities provide a hands-on approach to understanding and celebrating Hispanic traditions.

Categories
PDF

three fated hearts pdf free download

Three Fated Hearts: Overview

Three Fated Hearts, penned by LNCWrites/Nisha T., is a werewolf romance centered on Portia Tia Colby. Ignored by her family, she finds solace in friends as fate intertwines with alpha twins.

Synopsis of Three Fated Hearts

Portia Tia Colby exists in the shadow of her twin sisters, often overlooked and undervalued. Her only solace lies in the unwavering friendship of Mark and Lynn, who provide the acknowledgment she craves. This dynamic shifts dramatically with the introduction of the future Alphas of Emerald Lake Park, identical twins burdened with the responsibility of leadership but still lacking their fated mate.

As Portia’s world collides with the Alphas’, a complex web of emotions and destinies unfolds. The narrative explores themes of neglect, acceptance, and the magnetic pull of fated connections. The characters navigate a landscape of pack politics, personal desires, and the challenges of forging one’s own path when destiny seems predetermined. It’s a story where true recognition, acceptance, and love emerge amidst betrayal, drama and bravery.

Main Characters

The story revolves around Portia Tia Colby, overshadowed by her sisters. Her close friends, Mark and Lynn, offer support. The future Alpha twins seek their fated mate within this intricate narrative.

Portia Tia Colby

Portia, often called Tia, exists in the shadow of her twin sisters, constantly overlooked and underestimated by her family, save for her mother. This neglect has shaped her character, making her resilient yet yearning for genuine acknowledgment. Her return to Emerald Lake pack is reluctant, a place where she feels unwanted and insignificant due to her father’s favoritism towards her sisters.

Tia finds solace and true connection with her best friends, Mark and Lynn, who offer unwavering support and understanding. They are her anchor in a world where she often feels invisible. As the narrative unfolds, Tia’s journey involves self-discovery, navigating complex relationships, and perhaps finding an unexpected destiny that challenges her perceived worth. Her character embodies strength and vulnerability, making her a relatable and compelling protagonist in the world of werewolves and fated mates.

Mark and Lynn

Mark and Lynn form the unwavering support system for Portia Tia Colby, serving as her best friends and confidantes amidst her feelings of neglect and being overlooked by her family. They provide her with the validation and understanding she craves. Their friendship is a constant in her life, offering a safe haven where she is truly seen and appreciated.

Beyond offering emotional support, Mark and Lynn are integral to Tia’s journey, possibly influencing her decisions and providing different perspectives. Their roles may extend beyond mere friendship as the story progresses, potentially intertwining with the supernatural elements of the narrative. They might find themselves caught in the conflicts surrounding Portia and the alpha twins, testing the strength of their bond. Their loyalty and friendship add depth to the narrative, highlighting the importance of chosen family.

The Alpha Twins

The Alpha Twins are future leaders of Emerald Lake Park. Identical in appearance, they stand on the cusp of assuming their roles, but a crucial element is missing: their fated mate. Eager to claim their positions, their focus is on finding the one destined to stand by their side, a search that propels the narrative forward.

Their shared destiny and the anticipation of finding their mate create intrigue. The twins’ dynamic, both as individuals and as a unified front, will likely be explored. The question of how their individual personalities influence their leadership style adds complexity. The arrival of Portia Tia Colby could disrupt their expectations, forcing them to confront their desires and challenge their understanding of fate. Their journey promises to be one of self-discovery, leadership, and the unexpected twists of destiny.

Where to Read Three Fated Hearts

Three Fated Hearts is available on platforms like Libri, NovelDrama.org, Joyread, Anystories, GoodNovel and NovelCat. Readers search for PDF downloads, though availability may vary across sites.

Online Platforms

Several online platforms offer access to Three Fated Hearts. Libri provides full chapters of the novel by LNCWrites. NovelDrama.org hosts the werewolf genre story. Joyread features Three Fated Hearts as one of its best werewolf stories by Nisha T. Anystories offers the serialized version of the novel, covering themes like fate, jealousy, and love triangles. GoodNovel presents the story with werewolf and love-triangle elements.

Additionally, Webfic offers related content, including books related to the novel. NovelCat provides access to various books and novels. FictionMe showcases Chapter 2 of Three Fated Hearts. These platforms allow readers to engage with the story in different formats and discover related content. Some may offer options to purchase or subscribe for full access.

PDF Availability

Finding a free PDF download of Three Fated Hearts can be challenging. While some websites mention a PDF download, the availability and legality of these downloads can vary. NovelDrama.org is mentioned as offering the PDF, but it is crucial to verify the source’s legitimacy to avoid copyright infringement. Dream app also offers the series, but it is pay per chapter.

Readers should exercise caution when searching for free PDFs and consider supporting the author by purchasing the book through official channels if possible. Always ensure the source of the PDF is reputable to protect against malware or illegal content. Exploring official platforms for purchasing the e-book is a safer alternative.

Author Information

Three Fated Hearts is crafted by LNCWrites, who is also known as Nisha T. They primarily write werewolf romance novels, exploring themes of fated mates and pack dynamics in their stories.

LNCWrites/Nisha T.

LNCWrites, also known as Nisha T., is the author behind Three Fated Hearts, a werewolf romance novel available on platforms like Joyread, NovelDrama, and Libri. Nisha T. delves into the werewolf genre, exploring themes of fated mates, pack dynamics, and the challenges of love and acceptance. The author’s writing style is characterized by vivid descriptions and engaging plots, drawing readers into the immersive world of werewolves and their destined connections.

Nisha T; crafts stories with relatable characters and emotional depth, exploring themes of betrayal, drama, and the power of love. The author’s work often features strong female leads, complex relationships, and the supernatural elements of the werewolf world, captivating readers with compelling narratives.

Series Information

Three Fated Hearts has sequels, including Three Fated Hearts: Another Chance and Three Fated Hearts: Things Change, expanding the story of Portia, the alphas, and their intertwined destinies.

Sequels and Related Books

The captivating world of Three Fated Hearts extends beyond the initial story, offering readers further adventures and deeper dives into the characters’ lives. The series includes sequels such as Three Fated Hearts: Another Chance, which continues the saga of love, betrayal, and fated mates. This second installment delves into the complexities of relationships and the challenges faced by Portia and the Alphas as they navigate their intertwined destinies.

Following this is Three Fated Hearts: Things Change, further exploring the evolving dynamics within the pack and the personal growth of the characters. These sequels promise to deliver more of the drama, romance, and suspense that made the original story so engaging, ensuring fans have plenty to look forward to. Readers eager to immerse themselves further into this werewolf world can explore these subsequent books to uncover more secrets and witness the unfolding destinies of their favorite characters.

Categories
Manuals

camilla de transferencia manual abs

Camilla de Transferencia Manual ABS: An Overview

Manual ABS transfer stretchers are essential medical devices designed for the safe and efficient transport of patients within healthcare facilities. Their robust construction and adjustable features make them indispensable for medical staff.

Definition and Purpose of Manual ABS Transfer Stretchers

Manual ABS transfer stretchers are specialized medical devices used to safely and efficiently move patients between different locations within a healthcare facility. Constructed with durable ABS plastic, these stretchers facilitate transfers from beds to operating tables or diagnostic areas. The primary purpose is to minimize the risk of injury to both patients and medical staff during transport. Their manual operation provides control and reliability in various clinical settings, ensuring smooth and secure patient handling.

Key Features of Manual ABS Transfer Stretchers

Manual ABS transfer stretchers boast several key features, including durable ABS construction, adjustable height and backrest, and a reliable mobility and braking system. These features enhance functionality and patient safety.

Durable ABS Construction

The use of high-quality ABS plastic in the construction of these transfer stretchers ensures exceptional durability and resistance to impact. ABS is known for its robust nature, making the stretcher capable of withstanding the rigors of daily use in busy medical environments. This material is also easy to clean and disinfect, which is crucial for maintaining hygiene standards. Furthermore, ABS is lightweight, contributing to the stretcher’s maneuverability, and improving the overall lifespan of the medical equipment.

Adjustable Height and Backrest

Manual ABS transfer stretchers typically feature adjustable height settings, allowing caregivers to customize the stretcher to a comfortable and safe working level. This adjustability helps to reduce strain and the risk of injury for medical staff during patient transfers. The backrest can also be adjusted to various angles, providing optimal patient comfort and positioning. These adjustable features ensure that the stretcher can accommodate a wide range of patient needs and medical procedures, making it versatile for diverse healthcare settings.

Mobility and Braking System

Manual ABS transfer stretchers are equipped with robust mobility systems, typically featuring swivel casters that enable smooth and effortless maneuverability. These casters allow medical staff to navigate the stretcher through hallways, rooms, and other tight spaces with ease. A reliable braking system is also crucial, ensuring the stretcher remains securely in place during patient transfers and medical procedures. Central locking brakes are common, providing simultaneous locking of all wheels for enhanced safety and stability. The combination of smooth mobility and secure braking is essential for safe and efficient patient transport.

Benefits for Medical Staff

Manual ABS transfer stretchers offer numerous benefits for medical staff, including ease of operation, reduced training time, and enhanced efficiency in patient handling. These features contribute to a smoother workflow and improved patient care.

Ease of Operation and Reduced Training Time

Manual ABS transfer stretchers are designed for straightforward use, minimizing the learning curve for medical personnel. Their intuitive controls and user-friendly design contribute to a shorter training period. This allows staff to quickly become proficient in safely transferring patients, enhancing overall efficiency. The simple operation reduces the risk of errors during critical patient transfers, ensuring a safer environment. This ease of use is particularly beneficial in busy healthcare settings where time and resources are limited, optimizing workflow.

Enhanced Efficiency and Workflow

Manual ABS transfer stretchers significantly improve the efficiency of patient transport within medical facilities. Their design facilitates smoother and quicker transfers, reducing the time spent moving patients between departments. This streamlined process allows medical staff to focus on other critical tasks, optimizing workflow and improving overall productivity. The ease of maneuverability and adjustable features enable faster patient positioning, contributing to a more efficient healthcare environment. By minimizing transfer times, these stretchers help to reduce patient waiting times, improving the quality of care provided.

Patient Benefits

Manual ABS transfer stretchers prioritize patient comfort and safety during transport. Adjustable features and durable construction ensure a secure and comfortable experience, reducing stress and anxiety for patients during transfers.

Comfort and Safety During Transfer

Manual ABS transfer stretchers are designed to provide optimal comfort and safety during patient transfers. High-quality ABS plastic and durable frame materials ensure a stable and secure platform. Adjustable features like height and backrest adjustments allow for customized positioning, enhancing patient comfort. The smooth transfer capabilities minimize physical strain and discomfort, while braking systems ensure stability during movement. These features collectively promote a safe and comfortable experience, reducing the risk of injury during transport.

Reduced Stress and Anxiety

Manual ABS transfer stretchers play a crucial role in reducing patient stress and anxiety during medical transfers. The comfortable design, with adjustable height and backrest, allows patients to find a secure and relaxing position. Smooth and stable movement minimizes any fear of falling or discomfort. By ensuring a safe and comfortable transfer, these stretchers help alleviate patient anxiety, leading to a more positive experience. This can significantly improve patient cooperation and overall well-being, contributing to better clinical outcomes.

Design and Functionality

Manual ABS transfer stretchers are designed with both patient comfort and caregiver usability in mind. Their functional design ensures smooth transfers, while user-friendly adjustments cater to a variety of patient needs.

Ergonomic Design for Smooth Transfers

Ergonomic design is a cornerstone of manual ABS transfer stretchers, ensuring smooth and safe patient transfers. Features like strategically placed handles and a streamlined structure minimize strain on medical staff. The design facilitates easy maneuvering, reducing the risk of injury. This careful attention to ergonomics optimizes workflow efficiency and enhances the overall safety of both patients and caregivers during the transfer process within medical facilities. The smooth surface and rounded edges further contribute to patient comfort.

User-Friendly Adjustments

User-friendly adjustments are crucial for the efficient operation of manual ABS transfer stretchers. These stretchers feature intuitive mechanisms for height and backrest adjustments. The easy-to-reach controls allow medical staff to quickly adapt the stretcher to the specific needs of each patient and situation. This reduces the time and effort required for adjustments. The clear and simple design of the adjustment features minimizes the need for extensive training. This allows for seamless integration into existing workflows. Ultimately, user-friendly adjustments contribute to improved patient care.

Materials and Construction

Manual ABS transfer stretchers are built with high-quality materials for durability and safety. The use of ABS plastic and a sturdy frame ensures long-term reliability in demanding medical environments.

High-Quality ABS Plastic

The utilization of high-quality ABS (Acrylonitrile Butadiene Styrene) plastic in manual transfer stretchers provides a durable, lightweight, and easy-to-clean surface. ABS plastic is known for its resistance to impacts, chemicals, and scratches, making it ideal for the demanding environment of healthcare facilities. This material ensures the stretcher remains hygienic and structurally sound, even with frequent use and rigorous cleaning protocols. Its non-porous nature prevents the absorption of fluids and contaminants, contributing to infection control efforts and enhancing patient safety during transfers.

Durable Frame Materials

The structural integrity of a manual ABS transfer stretcher relies heavily on the durability of its frame materials. Typically constructed from high-strength steel or aluminum alloys, these frames provide a robust foundation capable of supporting significant weight and enduring frequent use. Steel frames offer exceptional strength and stability, while aluminum frames provide a lighter alternative without compromising structural integrity. The frames are often coated with corrosion-resistant finishes to protect against rust and wear, ensuring longevity and maintaining a clean, professional appearance in medical settings. Reinforced joints and robust welding techniques further enhance the frame’s ability to withstand demanding operational conditions.

Available Adjustments and Options

Manual ABS transfer stretchers offer a range of adjustments and optional features to enhance patient comfort and caregiver convenience. These include height adjustments, backrest positioning, integrated scales, and accessory mounts for tailored functionality.

Height and Backrest Adjustments

Manual ABS transfer stretchers typically feature adjustable height settings, allowing caregivers to match the stretcher surface to the height of beds or examination tables. This minimizes strain during patient transfers. Additionally, adjustable backrests provide customized support and positioning for patient comfort. Adjustments are easily made manually, often with simple crank mechanisms or levers that ensure smooth and safe adjustments. These features enhance both patient comfort and caregiver ergonomics, improving overall transfer efficiency.

Optional Features (e.g., integrated scale)

Some manual ABS transfer stretchers come equipped with optional features to enhance their functionality and utility in medical settings. One such feature is an integrated scale, which allows for convenient and accurate patient weight monitoring during transfers. Other options may include IV poles, oxygen tank holders, and additional padding for increased patient comfort. These optional features enhance the stretcher’s versatility, making it adaptable to a wider range of patient needs and clinical scenarios, further streamlining workflows and improving patient care.

Comparison with Competitor Models

Manual ABS transfer stretchers are evaluated against competitor models based on durability, ease of use, and cost-effectiveness. These comparisons help healthcare facilities make informed decisions aligned with their specific needs and budgets.

Strengths of ABS Transfer Stretchers

ABS transfer stretchers offer several advantages, including a durable ABS plastic surface that is easy to clean and resistant to damage. The high-strength frame ensures stability, while the adjustable height and backrest enhance patient comfort. Mobility is facilitated by smooth-rolling wheels with reliable braking systems. The ergonomic design reduces strain on medical staff, making transfers safer and more efficient. Furthermore, the minimal maintenance requirements contribute to long-term cost savings, making ABS transfer stretchers a practical choice for healthcare facilities.

Value Proposition

The value proposition of manual ABS transfer stretchers lies in their blend of durability, functionality, and cost-effectiveness. These stretchers provide a robust and reliable solution for patient transport, reducing the physical strain on medical personnel and enhancing patient safety. Their ease of maintenance and long lifespan contribute to a lower total cost of ownership compared to other models. With adjustable features and a focus on ergonomic design, ABS transfer stretchers offer a practical and valuable investment for healthcare facilities seeking to improve efficiency and patient care without compromising budget considerations.

Applications in Medical Settings

Manual ABS transfer stretchers are versatile and crucial in various medical settings. They facilitate safe patient transport in hospitals, clinics, rehabilitation centers, and nursing homes, enhancing efficiency and patient care across diverse environments.

Hospitals and Clinics

In hospitals and clinics, manual ABS transfer stretchers play a vital role in facilitating the safe and efficient movement of patients between different departments. These stretchers are essential for transporting patients from the emergency room to imaging, surgery, or recovery areas. Their sturdy construction and maneuverability ensure smooth transfers, reducing the risk of injury to both patients and medical staff. The adjustable features contribute to patient comfort during transport and enhance workflow efficiency within the hospital environment, ensuring timely care.

Rehabilitation Centers and Nursing Homes

In rehabilitation centers and nursing homes, manual ABS transfer stretchers are crucial for the daily care and mobility of patients with limited mobility. These stretchers facilitate safe transfers between beds, wheelchairs, and therapy areas, promoting patient comfort and dignity. The adjustable height and backrest features allow caregivers to customize the stretcher to meet individual patient needs, ensuring proper positioning and support. By reducing physical strain on staff, these stretchers enhance the overall quality of care and contribute to a safer working environment for healthcare providers in long-term care settings.

Maintenance and Care

Proper maintenance and care are essential to ensure the longevity and optimal performance of manual ABS transfer stretchers. Regular cleaning, disinfection, and inspection are vital for maintaining a safe and hygienic environment for patients.

Cleaning and Disinfection Procedures

Maintaining a hygienic environment is crucial when using manual ABS transfer stretchers. Regular cleaning and disinfection are essential to prevent the spread of infections. After each patient transfer, the stretcher should be thoroughly cleaned with a mild detergent and warm water. Pay close attention to areas that come into direct contact with the patient, such as the mattress and side rails. Following cleaning, disinfect the stretcher using an appropriate hospital-grade disinfectant, adhering to the manufacturer’s instructions for concentration and contact time to ensure effective germ elimination and patient safety.

Regular Inspection and Maintenance Tips

To ensure the longevity and optimal performance of manual ABS transfer stretchers, regular inspections and maintenance are vital. Periodically check all moving parts, such as wheels, brakes, and height adjustment mechanisms, for proper function and lubrication. Inspect the ABS plastic surfaces for any signs of cracks or damage, and promptly repair or replace components as needed. Verify the integrity of the mattress and clean it regularly to prevent wear and tear. Tighten any loose screws or bolts and ensure all safety features are functioning correctly, promoting a safe environment.

Manual ABS transfer stretchers offer a multitude of benefits, including durable ABS plastic construction for easy cleaning and robustness. Adjustable height and backrest provide customized patient comfort, while the mobility and braking system ensures safe transport. They enhance efficiency, reduce training time for staff, and improve patient comfort during transfers. Their ergonomic design and user-friendly adjustments further contribute to seamless operation. High-quality materials and optional features like integrated scales add to their value in medical settings, making them a worthwhile investment.

Importance in Patient Care

Manual ABS transfer stretchers play a crucial role in modern patient care by facilitating safe and efficient patient transport. These stretchers minimize the risk of injury to both patients and medical staff during transfers. Their adjustable features enhance patient comfort, reducing stress and anxiety. By streamlining workflow, these stretchers allow healthcare providers to focus more on patient care. The durable construction and ease of maintenance ensure long-term reliability, making them an indispensable tool in hospitals, clinics, and rehabilitation centers, ultimately contributing to improved patient outcomes and satisfaction within healthcare settings.

Categories
Manuals

naifay car stereo manual

NAIFAY Car Stereo Manual: A Comprehensive Guide

Welcome to the comprehensive guide for your NAIFAY car stereo! This manual simplifies the user experience, offering instructions for installation, operation of the 7-inch HD touchscreen, and connectivity features.

Overview of NAIFAY Car Stereo Systems

NAIFAY car stereo systems are designed to enhance your in-car entertainment experience, offering a range of features to suit various needs and preferences. These systems typically include a high-definition touchscreen display, often 7 inches in size, providing a user-friendly interface for navigation and control. NAIFAY stereos support various media formats, including MP3, USB, and AUX inputs, allowing you to play music and other audio content from different sources. Bluetooth connectivity is a standard feature, enabling hands-free calling and wireless audio streaming from your smartphone or other Bluetooth-enabled devices. Many NAIFAY models also incorporate FM radio with preset station options, ensuring access to your favorite radio broadcasts. Some units are equipped with advanced features such as Wireless CarPlay and Android Auto, Mirror Link, and backup camera support. The double DIN design allows for easy installation in most vehicles with a compatible dashboard opening. Whether you’re looking for a basic car stereo or a more advanced system with smartphone integration, NAIFAY offers a variety of options to upgrade your car’s audio system. User manuals are available online, providing detailed instructions for installation, operation, and troubleshooting. From basic models to the advanced X6C, it’s important to consult the manual.
The goal is to make your journeys more pleasant and comfortable.

Installation Guide for NAIFAY Double Din Car Stereo

Installing your NAIFAY double DIN car stereo involves several steps to ensure a secure and functional setup. Before you begin, make sure you have the necessary tools, including screwdrivers, wire strippers, and electrical tape. First, disconnect the car’s battery to prevent electrical shorts. Remove the existing car stereo from the dashboard, which may require unscrewing or unclipping the surrounding trim. Identify the wiring harness of your car and connect it to the wiring harness adapter provided with the NAIFAY stereo. Match the wires according to the color codes in the user manual, ensuring proper connections for power, ground, speakers, and other functions. Secure the connections with electrical tape or wire connectors. Connect the antenna cable to the NAIFAY stereo. If your model includes a backup camera, connect the camera’s video cable to the appropriate input on the stereo. Carefully slide the NAIFAY double DIN car stereo into the dashboard opening and secure it with screws or clips. Reconnect the car’s battery and test the stereo to ensure all functions are working correctly, including power, sound, radio, Bluetooth, and any additional features. Refer to the user manual for detailed instructions and wiring diagrams specific to your NAIFAY model; If you encounter any difficulties, it’s best to consult a professional installer to avoid damage to your car or the stereo system. Take your time and follow the instructions carefully for a successful installation. Remember, some models may require an additional Wiring Harness Adapter. The user manual is always your best friend when instaling.

Operating Instructions for 7-Inch HD Touchscreen Models

Operating your NAIFAY 7-Inch HD Touchscreen car stereo is designed to be intuitive and user-friendly. Once the unit is powered on, you’ll be greeted with the main menu, which typically displays options for Radio, Bluetooth, USB, AUX, Mirror Link, and Settings. To navigate, simply tap the desired icon on the touchscreen. For FM radio, tap the “Radio” icon. The screen will display the current frequency and preset station buttons. You can manually tune to a specific frequency using the onscreen controls or select a preset station. To save a station as a preset, tune to the desired frequency and long-press one of the preset buttons until the station is saved. For Bluetooth connectivity, tap the “Bluetooth” icon. Ensure that Bluetooth is enabled on your smartphone. The NAIFAY stereo will search for available devices. Select your phone from the list and enter the pairing code if prompted (usually “0000”). Once paired, you can make and receive calls, as well as stream audio from your phone. To use the USB function, plug a USB drive containing music or video files into the USB port. Tap the “USB” icon to access the files. The stereo supports various audio and video formats. For the AUX input, connect an external audio device to the AUX port using a 3.5mm audio cable; Tap the “AUX” icon to listen to audio from the connected device. The Mirror Link function allows you to mirror your smartphone’s screen on the car stereo display. Connect your phone to the stereo via USB. Follow the onscreen prompts to enable Mirror Link (compatibility may vary depending on your phone model). The settings menu allows you to customize various aspects of the stereo, such as display brightness, audio settings, and language. Consult the user manual for more detailed information and troubleshooting tips. Enjoy your seamless touchscreen experience!

Wireless CarPlay and Android Auto Connectivity

NAIFAY car stereos offer seamless wireless connectivity with both Apple CarPlay and Android Auto, allowing you to integrate your smartphone experience directly into your car’s infotainment system. To establish a wireless connection, begin by ensuring that both Wi-Fi and Bluetooth are enabled on your smartphone. On your NAIFAY car stereo, navigate to the settings menu and select the CarPlay or Android Auto option. The stereo will then begin searching for available devices. On your iPhone, go to Settings > General > CarPlay and select your NAIFAY stereo from the list of available cars. For Android Auto, open the Android Auto app on your phone or access it through the settings menu. Select your NAIFAY stereo from the list of available devices. Follow the on-screen prompts on both your phone and the car stereo to complete the pairing process. Once the initial connection is established, your phone should automatically connect to the car stereo wirelessly each time you enter the vehicle, provided that Bluetooth and Wi-Fi are enabled on your phone. With Wireless CarPlay, you can access your iPhone’s navigation, music, phone calls, messages, and other compatible apps directly from the car stereo’s touchscreen. Siri voice control is also available, allowing you to make hands-free calls, send texts, and control music with simple voice commands. Android Auto provides a similar experience for Android users, offering access to Google Maps, Google Assistant, music streaming services, and other compatible apps. The intuitive interface of both CarPlay and Android Auto minimizes distractions and allows you to stay focused on the road while enjoying your favorite entertainment and staying connected. If you encounter any difficulties during the connection process, consult the troubleshooting section of this manual or refer to the official Apple CarPlay or Android Auto support websites for further assistance. Enjoy the convenience of wireless connectivity!

Troubleshooting Common Issues

Even with careful setup, occasional issues may arise with your NAIFAY car stereo. This section outlines solutions to common problems. No Power: First, check the car’s fuse box for blown fuses related to the car stereo. Replace any blown fuses with the correct amperage rating. Verify that the car stereo’s wiring harness is securely connected to both the car’s wiring and the back of the stereo unit. Ensure the car’s ignition is turned on, as some stereos only receive power when the ignition is active. If the problem persists, consult a professional car audio installer. No Sound: Check the volume level on the stereo and ensure it’s not muted. Verify that the speaker wires are properly connected to the car stereo and the speakers themselves. Inspect the speaker wires for any damage or shorts. If using an external amplifier, ensure it’s powered on and properly connected. Test with different audio sources (FM radio, Bluetooth, USB) to isolate the problem. Bluetooth Connectivity Problems: Make sure Bluetooth is enabled on both your phone and the car stereo. Clear the pairing history on both devices and attempt to re-pair them. Ensure that your phone is within range of the car stereo. Check for software updates for both your phone and the car stereo, as outdated software can sometimes cause connectivity issues. CarPlay/Android Auto Issues: Verify that your phone is compatible with CarPlay or Android Auto. Ensure that you have the latest version of CarPlay or Android Auto installed on your phone. Check the USB cable (if using a wired connection) for damage. Try a different USB port or cable. Make sure CarPlay or Android Auto is enabled in the car stereo’s settings. Touchscreen Unresponsive: Try restarting the car stereo by turning it off and on again. Clean the touchscreen with a soft, dry cloth. Check for any software updates for the car stereo, as updates can sometimes resolve touchscreen issues. If these steps do not resolve the issue, contact NAIFAY customer support or a qualified car audio technician for further assistance.

Mirror Link Functionality with iOS and Android Phones

The Mirror Link feature allows you to display your smartphone’s screen on the NAIFAY car stereo’s display, enabling you to access apps, navigation, and other content directly from the stereo’s touchscreen. Please note that compatibility and functionality can vary depending on your phone model and operating system version. For Android Phones: Before attempting to use Mirror Link, ensure that you have the correct app installed on your Android phone. The app name may vary depending on the specific NAIFAY car stereo model, so consult the product manual or the car stereo’s settings menu to identify the correct app. Connect your Android phone to the car stereo using a USB cable. Some models may also support wireless Mirror Link via Wi-Fi. Once connected, you may need to grant permissions on your phone to allow the car stereo to access its screen. Follow the on-screen prompts on both your phone and the car stereo. The car stereo’s display should now mirror your phone’s screen. You can control your phone’s apps and functions directly from the car stereo’s touchscreen. For iOS Phones (iPhones): Mirror Link functionality with iOS devices may be limited or unavailable depending on the specific NAIFAY car stereo model and the iOS version. Some models may support Apple CarPlay, which offers a more integrated and user-friendly way to access iPhone features in your car. To use CarPlay, connect your iPhone to the car stereo using a Lightning cable. The car stereo should automatically detect your iPhone and launch CarPlay. If CarPlay does not launch automatically, check the car stereo’s settings menu to enable it. If Mirror Link is supported for iOS, the connection process will be similar to that of Android phones, requiring a USB connection and the installation of a specific app. Please consult your product manual for more detailed instructions. Troubleshooting: If you experience issues with Mirror Link, ensure that the USB cable is properly connected and that your phone is unlocked. Restart both your phone and the car stereo. Check for software updates for both your phone and the car stereo. If the problem persists, consult the NAIFAY customer support or a qualified car audio technician.

FM Radio and Preset Station Configuration

The NAIFAY car stereo features a built-in FM radio receiver, allowing you to enjoy your favorite local radio stations while on the road. To access the FM radio function, locate the “Radio” or “FM” icon on the main menu of the car stereo’s touchscreen and tap it. The radio interface will then appear on the screen. Tuning to a Station: You can tune to a specific FM station using several methods: Manual Tuning: Use the left and right arrow buttons on the screen to manually step through the FM frequency band. Each tap will increment or decrement the frequency by a small amount. Seek Tuning: Press and hold the left or right arrow buttons to activate the seek function. The radio will automatically search for the next available station with a strong signal. Direct Frequency Input: Some models may allow you to directly enter the frequency of the station you want to listen to using a numeric keypad on the screen. Presetting Stations: The NAIFAY car stereo allows you to save your favorite FM stations as presets for quick access. To preset a station: Tune to the station you want to save using one of the methods described above. Press and hold one of the preset buttons (usually numbered 1-18) on the screen. After a few seconds, the station’s frequency will be saved to that preset button. Repeat this process for other stations you want to save. Recalling Presets: To listen to a preset station, simply tap the corresponding preset button on the screen. The radio will immediately tune to the saved station. Scanning and Saving Stations Automatically: Some NAIFAY car stereo models offer an automatic scan function that will scan the entire FM frequency band and save all available stations as presets. To use this function, go to the radio settings menu and look for an option such as “Auto Scan,” “Automatic Preset,” or “APS.” The radio will then scan for stations and save them to the preset buttons. Troubleshooting: If you are experiencing poor FM reception, ensure that the car’s antenna is properly connected and extended. Try relocating the antenna to a different position. If the problem persists, consult a qualified car audio technician.

Bluetooth Connectivity and Hands-Free Calling

NAIFAY car stereos offer seamless Bluetooth connectivity, enabling you to pair your smartphone for hands-free calling and wireless audio streaming. This feature ensures safer driving by allowing you to answer calls without taking your hands off the wheel. Pairing Your Smartphone: To connect your smartphone to the NAIFAY car stereo via Bluetooth, follow these steps: Enable Bluetooth on Your Smartphone: Go to the Bluetooth settings on your smartphone and turn Bluetooth on. Access Bluetooth Settings on the Car Stereo: On the car stereo’s touchscreen, locate the “Bluetooth” icon or menu option and tap it. This will open the Bluetooth settings interface. Initiate Pairing: The car stereo will typically display a list of available Bluetooth devices or a “Pair New Device” option. Select the option to initiate pairing. Select the Car Stereo on Your Smartphone: Your smartphone will scan for available Bluetooth devices. From the list of devices, select the name of your NAIFAY car stereo (e.g., “NAIFAY-BT” or “CAR-BT”). Enter Pairing Code (if required): If prompted, enter the pairing code (usually “0000” or “1234”) on your smartphone. Some devices may not require a pairing code. Confirm Pairing: Once the pairing code is entered (if required), confirm the pairing request on both your smartphone and the car stereo. Hands-Free Calling: Once your smartphone is successfully paired, you can make and receive calls hands-free through the car stereo: Answering Calls: When you receive a call, the car stereo will display an incoming call notification on the touchscreen. Tap the “Answer” button on the screen or press the “Call” button on the car stereo to answer the call. Making Calls: To make a call, you can either use the car stereo’s dial pad (if available) to enter the phone number or access your phone’s contact list through the car stereo’s Bluetooth interface. Adjusting Volume: Use the volume control on the car stereo to adjust the call volume. Ending Calls: Tap the “End Call” button on the screen or press the “Hang Up” button on the car stereo to end the call. Audio Streaming: In addition to hands-free calling, you can also stream audio wirelessly from your smartphone to the car stereo via Bluetooth: Select Bluetooth Audio Source: On the car stereo, select “Bluetooth Audio” or “A2DP” as the audio source. Play Audio on Your Smartphone: Start playing audio on your smartphone (e.g., music, podcasts, audiobooks). The audio will be streamed to the car stereo and played through the car’s speakers. Use the car stereo’s controls to play, pause, skip tracks, and adjust the volume. If you encounter pairing issues, verify that Bluetooth is enabled on both devices and that the car stereo is discoverable. Consider restarting both devices.